一、终端开启SSH功能,方便修改出错维护
1.可进入登录界面,输入用户名和密码;
2.Troublesboot Options 按enter键进入下级页面;
3.在选择ssh选项是enter键切换启用或者禁用。(显示Disable为已开启,是关闭选项)
或者直接在网页后台打开SSH功能
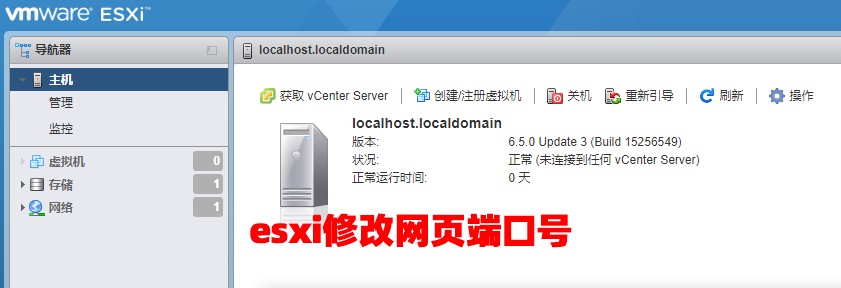
二、VI编辑器修改网页端口号
vi /etc/vmware/rhttpproxy/config.xml
找到以下原内容
<!-- HTTP port to be used by the reverse proxy -->
<httpPort>80</httpPort>

<!-- HTTPS port to be used by the reverse proxy -->
<httpsPort>443</httpsPort>
修改后具体的端口号
<!-- HTTP port to be used by the reverse proxy -->
<httpPort>7780</httpPort>

<!-- HTTPS port to be used by the reverse proxy -->
<httpsPort>7779</httpsPort>
三、增加防火墙配置
1.防火墙的配置文件在这里
/etc/vmware/firewall/service.xml
2.在用VI修改时如果提示无权限修改,请给予权限:
chmod 644 /etc/vmware/firewall/service.xml
chmod +t /etc/vmware/firewall/service.xml
3.将文字复制到最下面即可。
 <service id='0088'>
    <id>http7780</id>
    <rule id='0000'>
      <direction>inbound</direction>
      <protocol>tcp</protocol>
      <porttype>dst</porttype>
      <port>7780</port>
    </rule>
    <enabled>true</enabled>
    <required>false</required>
  </service>

  <service id='0089'>
    <id>hhtps7779</id>
    <rule id='0000'>
      <direction>inbound</direction>
      <protocol>tcp</protocol>
      <porttype>dst</porttype>
      <port>902</port>
    </rule>
    <rule id='0001'>
      <direction>inbound</direction>
      <protocol>tcp</protocol>
      <porttype>dst</porttype>
      <port>7779</port>
    </rule>
    <enabled>true</enabled>
    <required>true</required>
  </service>
4.将端口开放后,记得回来恢复文件的权限:
chmod 444 /etc/vmware/firewall/service.xml
chmod -t /etc/vmware/firewall/service.xml
四、添加引导文件
默认重启后,防火墙规则会恢复回原来,需要修改引导文件。
1.1将变动的文件打个 压缩包,生成的文件要放到 /bootbank目录下
tar -cvzf service.tgz /etc/vmware/firewall/service.xml
1.2使用bootModuleConfig脚本向将该文件添加到启动配置文件里 /bootbank/boot.cfg
BootModuleConfig.sh --add=service.tgz
1.3查看 boot.cfg,看看里面有没有---service.tgz。有即表示配置添加成功。
1.4重启以后,可以使用bootOption -m 查看新增加的配置是否生效
注意:这种方法比较方便,但有可能在下一次打系统补丁后消失,因为新的补丁的配置文件里并不包含你修改的部分。